Overview
There are two possibilities where you get your data from:
You have the files on your harddisk
You have obtained an ISO-image for your CD(let's say from the internet)
And there are two possibilities how you can burn to your CD:
You master your files together to an image, save it on disk and burn it on CD.
You master your files together and burn them 'on the fly' on CD.
Besides that, there are two enhancements you could want from your CD:
You want it bootable
You want to write on it several times (multi-session).
Now that's what's covered by this article. The different combinations of the above options make this article a real tour jumping
from one
point to another depending on what you want. The usage of CD-RWs is discussed here
Step-by-step
If you want to burn a CD from an ISO-image, proceed with Using an ISO-image to burn a CD.
How to get files from my harddisk on the CD
Start X-CD-Roast, chose Create CD -> Master tracks.
About the following screen appears:
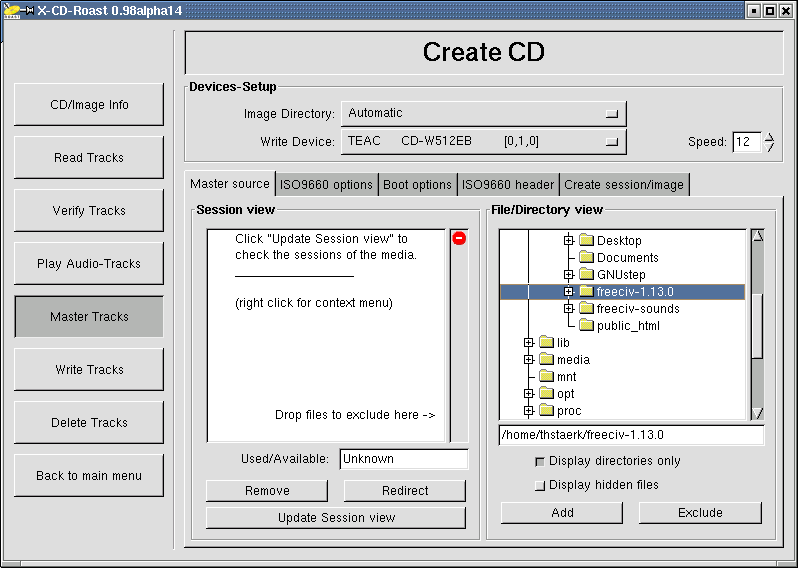
There are two windows in the screen: on the right, you see the contents of your harddisk, on the left, you see the layout
of your data-CD
so far. You can use full drag+drop in that menu. Just drag
the files/paths from the right to the left window to add and the other way
to remove. You can also drag files from Gnome and KDE filemanagers into that session
view window.
Add the paths you want to have on your CD to the session view.
Now you can open several tabs and change options. If you are not sure, leave it out. Most options will default to your wishes:
ISO9660 options - Change your CD's format. For example, you can decide on the length of filenames.
Boot options - Make your CD bootable on different hardware-architectures. If you want this, proceed here
ISO 9660 header - Set publishing information about the CD, for example, your name
Next, click on the tab "Create session/image". The session will be created and your CD's size will be calculated automatically.
The next step
is to decide whether you want to write on-the-fly or store an image on your harddisk. Usually, you will burn on the fly if
you have a
burn-proof CD-device and otherwise save an image to the disk.
Writing on-the-fly
If you want to write on-the-fly, decide whether you want a multi session CD and check the button "Write as multi session"
as appropriate.
Then, click on "Master and write on-the-fly". Insert a CD and confirm this step. Your CD will be ready in a few minutes.
Storing files in an image on the harddisk
If you need to master your files to an image, first change the textbox "file prefix" to something you can remember.
We take the prefix "example". Then, click on "Master to image file".
After a short while, a message saying "mastering successful" appears. You can now write the tracks on CD.
Writing the tracks
Select "Write tracks" to come to a screen like this:
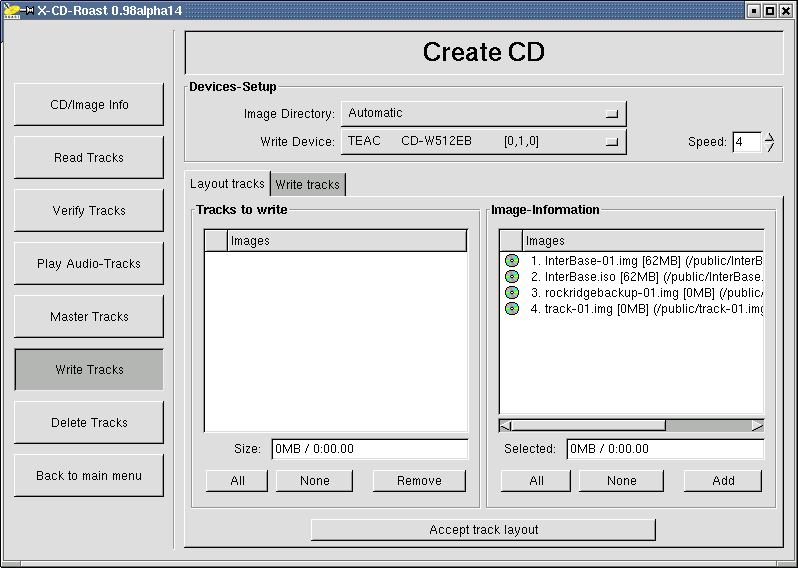
Here you can also use drag+drop to add files to write
or, if you have several, to rearrange them. Add your session ("example") to the CD, then click on "Accept track layout".
The tab changes from "Layout tracks" to "Write tracks".
To start writing (burning) click on the lower button "write tracks". Insert a CD and confirm by clicking on "OK".
After a few minutes, your new CD should be ready.
How to make it bootable
To make a CD bootable, you first need a bootable image, for example, from a bootdisk.
To get this, put a bootdisk of your favorite operating system into the floppy drive fd0 and type
dd if=/dev/fd0 of=/tmp/bootdisk.img. The computer will save a file named bootdisk.img.
It must be located in a folder that you added to your CD (in this example, you must have the folder /tmp added). After that,
go to
Create CD -> master tracks -> boot options in X-CD-Roast.
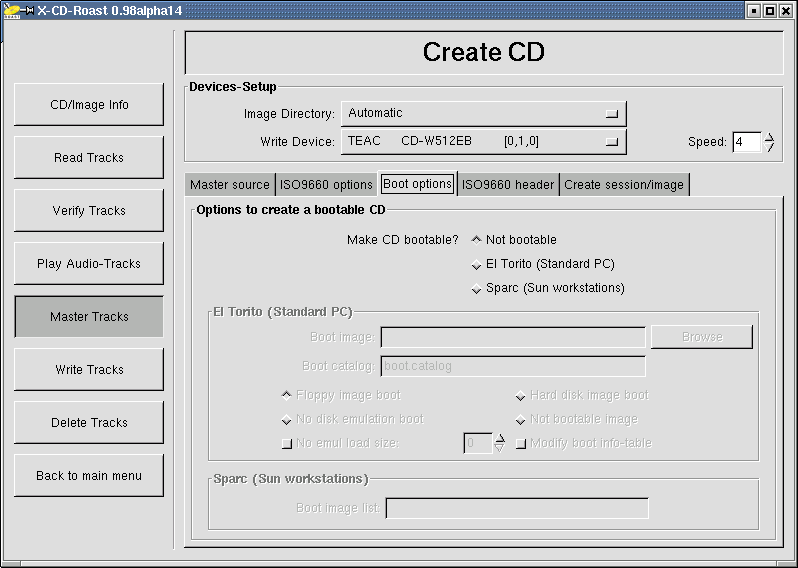
Click on El Torido, then on "Browse" and fetch your image from /tmp. When your CD is ready, you will be able to boot a standard
computer
with. To get it ready, proceed with mastering your CD.
Using an ISO-image to burn a CD
Copy your image file into a folder that you specified as image-directory during the
setup process. I will call your image example.iso; it should have the suffix .iso.
After you copied it, things are as if you had read the image with X-CD-Roast.
So, you can start xcdroast, select Create CD and proceed with writing the tracks.
Solving problems
Error while calculating session size
When calculating the size of your future CD, the whole layout of the file system is created. Problems with filenames will
come up then. Let's, for example, look at this one:
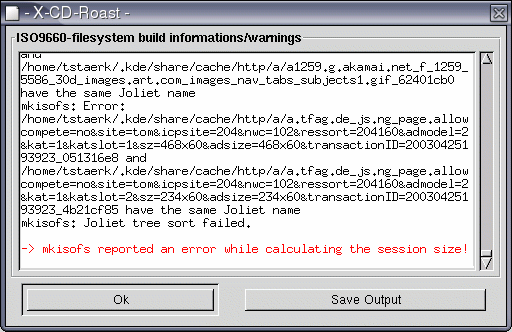
If you look at it closely, you will find that the error was caused by two files that will have the same name on the CD. This
is because Joliet
cuts filenames at 64 Characters. Possible solutions include:
Enable "Allow 103 character Joliet
filenames" option.
under "ISO9660 options" enable "Allow 103 Character Joliet filenames"
renaming (at least) one of the two files
under "ISO9660 options" turning off Joliet works too, but is not often wanted
Warning while calculating session size
If the warning comes up that your filesystem is not conform to ISO9660:
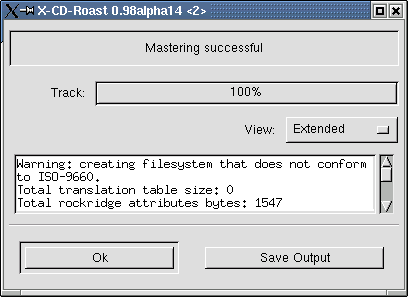
Don't worry. No one needs to burn fully conforming ISO-9660 CDs nowadays.
 How to rip a CD


 How to rip a CD
